Back to the Article Section
 ROVER-HAULIN
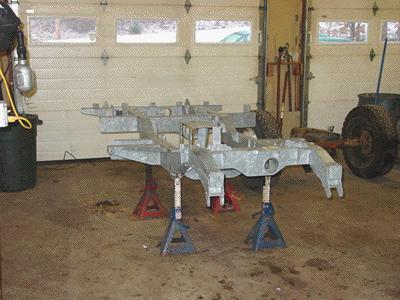
FRIDAY 8:00AM
Day 2 started off by moving the new galvanized frame from Rovers North into the shop. Paint and prep. on the body panels is also back underway to get the bulkhead under paint and ready to go as soon as possible.

A frame change is something that we have done in one day in the past, but this project goes far beyond just a new frame. After over 400,000 miles of use, nearly everything in and on the 88 is worn out. Above you can see a piece of the throttle linkage. The hole is supposed to be round, but years of on and off the throttle have eaten into the steel to make the hole look like this. Imagine this type of wear multiplied by all the parts in the Rover. Imagine how bad the throttle feel would be, or how bad the steering. Lots of people call us and say they want a vintage Rover as a daily driver. If you get one, you will have wear like this, maybe not to this level, but these vehicles are 40 years old. Unless they are restored you likely won't have much fun driving them, they'll feel sloppy and worn out. We can solve all that with an ECR restored or refurbished Rover, but 40 years of use doesn't usually make for a pristine vehicle. The good thing about Rovers is they can be made to be like new again, but most everything on the open market today, that has not been gone through by a shop like ECR, is pretty much just used up. much like this 88.
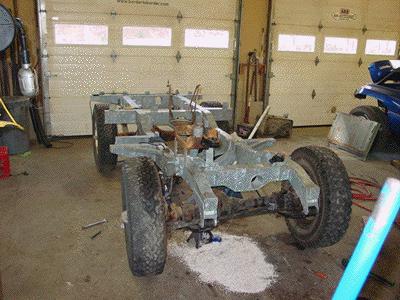
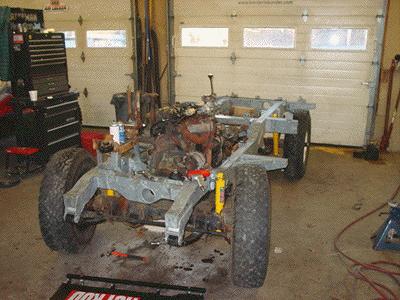
The new rolling chassis goes together pretty quickly with the new parabolic suspension. The new springs come with new U-bolts and the install is straight forward. The new suspension will offer a better ride, better handling and all with no down side. For more information on parabolic suspension go here. If you want to get a parabolic suspension for your own 88 or 109 contact Rovers North and they'll set you up with what you need. The brakes and wheel seals will be done later on for now we need to get the 88 rolling again and get the items done that need to be before the drivetrain goes back in.
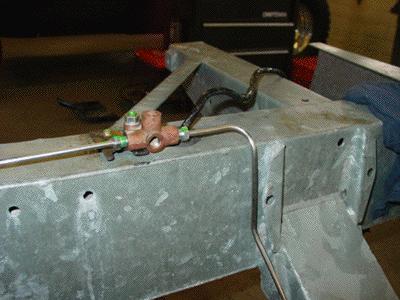
Some of the systems that need to be put in place before the bulkhead and drivetrain parts start to come back are the rear wiring harness and the brake pipes. Above you can see that we have installed the rear wiring harness and we have started to make the new brake pipes for the Rover. This time though, we have removed the rusted lines, and even a few copper lines we found in the system (Copper lines are not legal for road use in the USA) and replaced them with new ECR stainless steel brake pipes. These pipes will never corrode and never burst like a standard line. They are well worth the effort, especially if you are going to all this trouble. Do you really want to be doing brake lines again in a few years time?
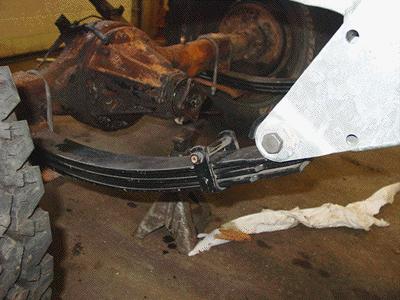
Here you can see the rear parabolic springs going into place. The springs are a direct replacement and fit without issue, and on our time frame that is a very welcome thing, to have the right parts that fit correctly.
Since the suspension went in without issue and the brake pipes are done we have installed the drivetrain. There are a few more engine gaskets to fix, and a new thermostat to put in, but as the bulkhead has now been painted and is in a bake cycle in the paint booth we have to move forward. We can work on the engine later, but the bulkhead is the next key piece to the puzzle, and it needs to go on as soon as possible so that other systems bolted to it can be set up.
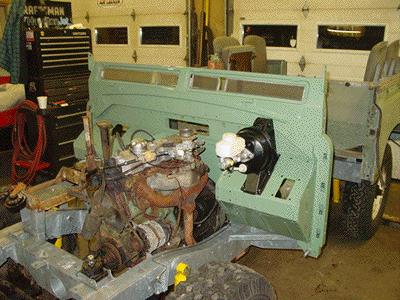
Here you can see that the bulkhead is now in place, as is the rear body. We have started to install some of the updated systems such as the Series III power dual circuit brakes and we have also made all the needed repairs to the engine, including a number of new gaskets, new hoses. fuel lines, fuel filters valve adjustment and a lot of cleaning. Most of day 2 was spent cleaning up and rebuilding the pieces that will be going back on the Rover, so although it doesn't look like a whole lot of progress on the Rover itself, getting the parts cleaned and rebuilt and ready to bolt back on will make the project go faster in the end.
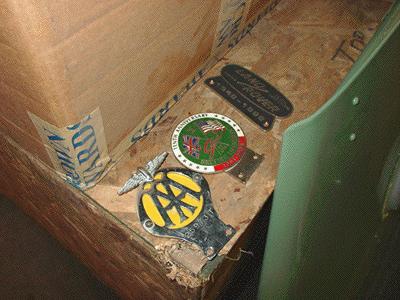
Day 2 was also about some of the details for the Rover. Rattling around inside the 88 we found these neat badges. Jeff had obviously been keeping them in the truck in hopes of putting them on some day, so we decided to add yet another work order to the project and make a small mounting bar for the front of the 88 that would hold these badges, much like the ones found on older MG's and other British cars. We also decided to add on some driving lights to the project. If Jeff keeps having these runs ins with large mammals we figured we better give him more light. So we donated a set of driving lights and Rovers North offered up a new set of Hella H4 headlights to help the 88 see more clearly.
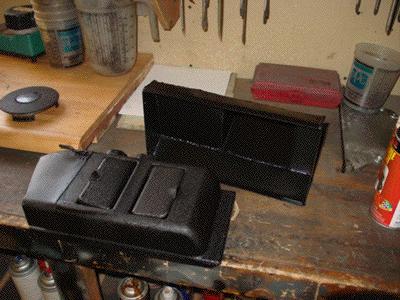
We also fabricated a distribution box that will allow the Mansfield heater that Rovers North sent to work with the original Kodiak heater. The Mansfield unit will put out a lot more heat than the old Kodiak, but it will have a vintage look on the inside. Jeff has a great love of original stuff on his Rover, so we went the extra mile on these parts. The heater cover was restored and made to function as an original, but with modern parts behind it. Jeff is the guy we had to convince to get rid of his generator in favor of an alternator, so if you understand that, you'll know why we went the extra mile to get these updates done for drivability, but with a little vintage flair.
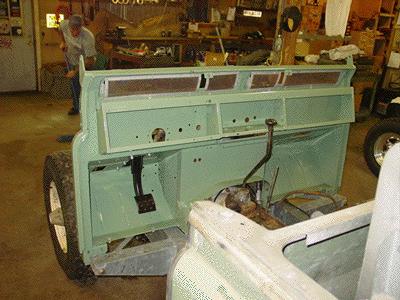
The bulkhead and rear body are now installed and lined up, and some of the details are starting to go back on the bulkhead, like the bug screens and such. The fuel tank has been installed and the fuel sender restored to work again. 100's of small parts have been cleaned, primed and painted and even more parts have been custom fabricated and sent to paint. All the remaining body panels have now been sourced and have been sent to Mike for prep and paint as well. The 88 is already looking a ton better than it did 48 hours ago, with its gleaming new rust free bulkhead, new suspension and new galvanized frame. The QE I will sail again, and be a better vehicle once we are done. Above you can see Steve sweeping up the shop in the background and it is a good time to take a break for the weekend. It is the end of day 2.