Manxter #9 continues...
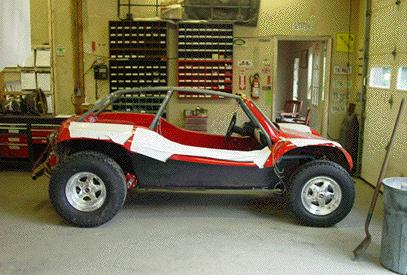
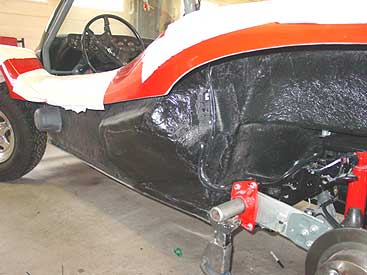
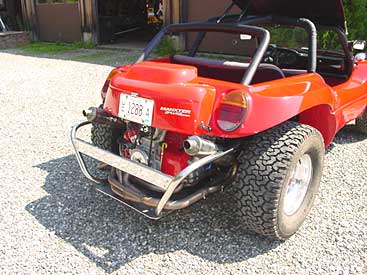
Here you can see that we have drilled the blank rotors for the Chevrolet bolt pattern on the new Weld Racing rims and fitted the new rims with a set of BFG All Terrains.
The correct rims and tires really make the buggy look finished as you can see from these images.
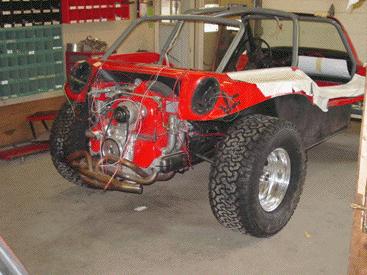
The wiring will now be finished up and then the buggy will be made ready to start up and do some testing.
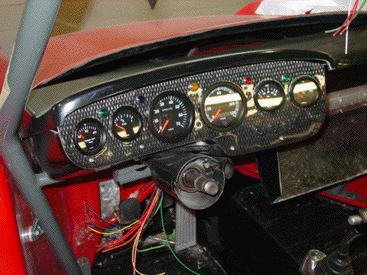
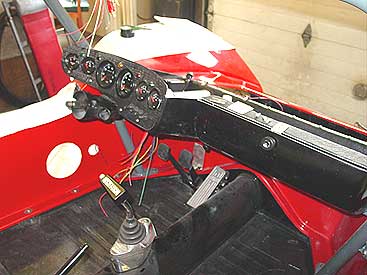
The dash system has now been installed with a full compliment of VDO Vision gauges with everything a hot Type 4 motor needs, from head temp, to oil pressure. The wiring has been completed for the front section of the buggy and only the steering column wiring is still left to complete. We carried over the carbon fiber look from the windscreen frame to the dash for a different custom look.
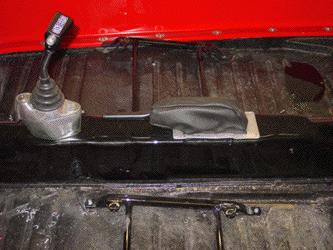
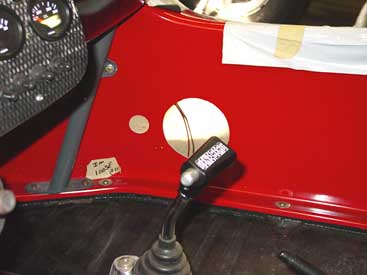
For the e-brake we made a simple alloy trim ring and a simple black leather boot. The factory VW rubber boot has provisions for the defroster controls, and leaving it open with the cables exposed looked nasty, so this simple solution gives a nice finished look.
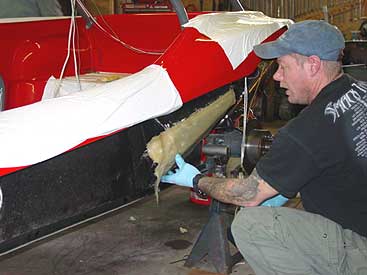
Here you can see our resident fiberglass guy, Steve, putting the finishing glass touches on the sub-woofer enclosures. These will house the 10" Rockford-Fosgate subs (one on each side) and then they will be covered up by the side pods for a clean look.
Yeah, it stings a little when you have to cut huge holes in your 7000 dollar buggy body, but you gotta do, what you gotta do. You have to have tunes! Miles and miles with no tunes and only wind noise... I don't think so. The subs will hide well once the painted grills go on, thanks to hiding them in the side pod, and the rear seat will still fit without issue.
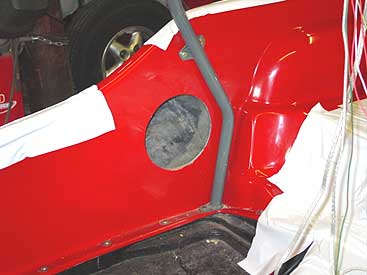
More holes! Here you can see the holes cut for the front speakers on the LH side. Matching holes are in the LH side for a nice sound system that will produce good sound quality even at road speed in the open top buggy.
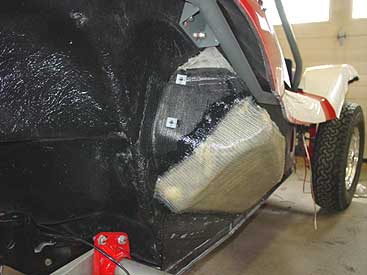
This image shows the completed side sub woofer mounts waiting for paint. The entire thing will be covered by the side pod, so none of this will be seen, but it needs to look good anyway. Its all about the details.

The lower dash is now complete with all the wiring in place for the gauges, ignition, 12v power point and all the systems. The speaker cross overs have been mounted in this area as well to keep them out of the elements as much as possible. Next we'll install the modified fuel tank and get the front end of the buggy completed.
Small details are also being finalized at this stage. The glove box door and trim have been installed in order to get ready to fit the upper dash and the windshield frame for the last time.
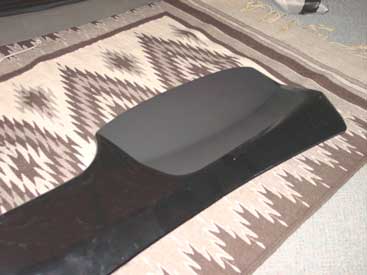
Speaking of the upper dash panel, we made a change there as well. The good thing about working at ECR is that you get to log thousands of miles in dune buggies, and you get to see what you do and do not like about customers buggies. After driving a number of Manxters around we found that on sunny days (the days you normally drive a buggy) the sun reflects badly off the gloss on the upper dash panel and projects that onto the windshield making it hard to see. As Manxter #9 will be driven a lot, and is not a show car, we taped off the area that usually reflects the sun and painted it with some PPG flat black to eliminate the sun glare. It may not look show car slick, but it helps the driveability factor, and #9 is all about the drive.
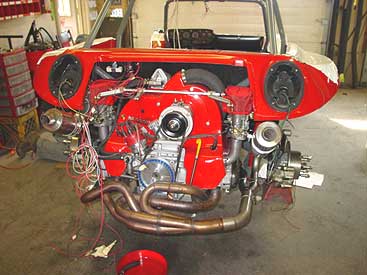
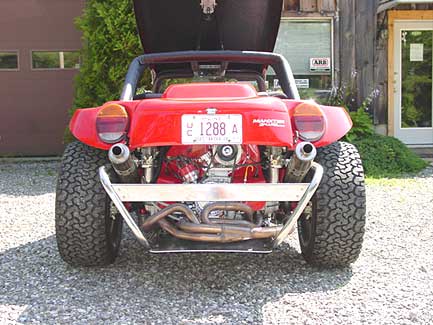
Out back the "try and stuff a Type 4 in your Manxter" fun continues as we have completed the install of the stainless steel exhaust system. To make this work with the Manxter rear bumper and those wide rear tires took a lot of fabrication. Not one part in the rear bumper area came from the kit. Once you see it, you'll see that it will all look stock, but when you take a closer look you'll see we fabricated it all here at ECR to clear that exhaust and the tires.
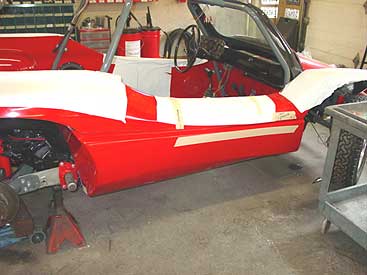
Now that the speakers have been installed and the subs tested we have started to install the side pods for the last time. Here on the RH side pod we had to do the usual cutting to make it fit, but it went on well.
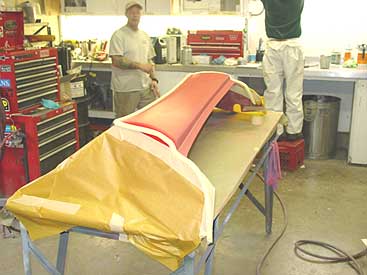
The LH side pod was a different story. Sadly this is the 3rd set of side pods for Manxter #9. 2 sets did not match in color and were sent back (along with the original hood). This 3rd set did match in color, but we found a huge 3" x 14" blemish on the face of it from something that was in the mold before (a different color red), and it is now glassed into the side pod. So we have instituted our own quality control and we have prep'd the side for a repair to the gel coat, and we will re-gel the entire area and then blend it into with the other area. Here you can see that Mike and Steve have prep'd the side pod and are just about to take it into our spray booth to get it fixed up. Once it is done and buffed it will be installed on the buggy.

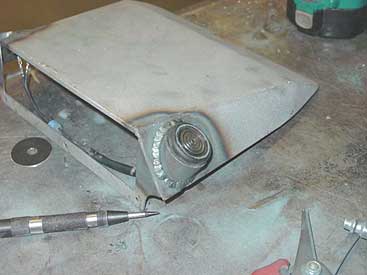
On the front of the buggy we have installed the front bumper and turn signals. The way the front bumper was made it raked up to much at the nose when installed and looked odd. This "rake" also had the unpleasant side affect that when you opened the hood it would immediately close and would not remain open, as the bumper would not allow it to open far enough. To solve this we made some 1.5" spacers that fit between the bumper and the bumper mount (see the green arrow). These made the bumper sit level and made it so you can open the hood and leave it open without having to hold it open.
Here you can see our radio mount in its raw steel form. We need to be able to read maps and do a lot of night driving, so we have installed a small light on the L and R side of the radio mount to serve as interior/ map lights for the buggy. We made the mounts and tig welded them in. Now the radio mount will be sent to our paint department for priming and painting in grey to match the roll cage.
This image shows the LH side of the buggy. The sub pods are done, the front speakers installed and all the wiring is complete. This area is now ready for the side pod.
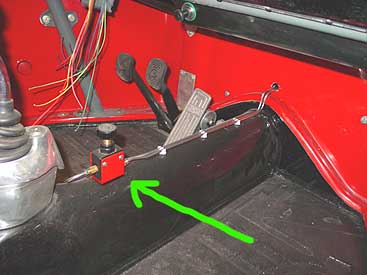
Inside the buggy we have finalized the brake system. After driving a number of Manxters around we decided to add a brake bias valve to the control the front brakes. This will allow us to dial back the front brakes in times when there is a lot of sand on the road and therefore stop the lock up of the front wheels while still giving the rear brakes full juice. The bias valve (green arrow) is simple and we installed it in a simple bracket that is within easy reach of the driver and ran it all stainless steel brake pipes for longevity. This set up will really help driving the buggy around here in New England where they put lots of sand on the road and it hangs out there until late spring.
In the rear of the buggy we made some changes to the rear bench seat. We formed a fiberglass pocket in the back of the seat to allow it to go backwards just a little more to squeeze some more precious interior space out of the Manxter. This will also allow the seat to angle back a little bit and give a better seating position for the kids in the back. (adults can't ride back there)
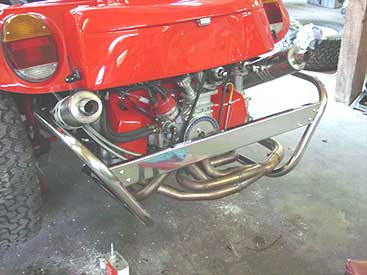
This image show the completed exhaust and rear bumper system. The stainless type 4 exhaust have been shoe horned into place and the rear bumper system modified to look like the one that was supplied with the kit, but in reality there are no kit pieces in the rear bumper system. Once it was bolted in place we polished the cross bar for a nice finished look. The skid plate is still to come.

In the rear of the interior we have finished everything up that will be underneath the rear seat. The battery is bolted down on the RH side and on the LH side we have fabricated a cover for the stereo amplifier. This will shield it from water if the buggy gets caught in the rain. The cover is hinged so it is easily tilted to access the amplifier and there is plenty of space underneath it to allow water to exit the pan without touching the amp. You can also see in this image we have painted the subwoofer covers to match the body color and installed them over the subs for a hidden look to the sound system.
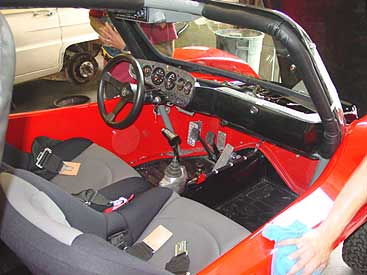
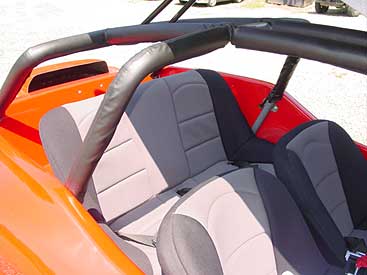
Up front we have started to finish off the many details needed to get the buggy road ready. The steering is complete as are the dash and steering column switches and the front seats have been installed along with the roll cage covers.
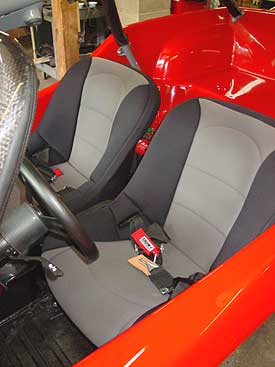
The seat we went with are Beard seats in a color combination to match the accents on the buggy. The suspension and roll cage are grey, and the pan and such are black so we went with a black and grey combination to tie everything together. The 3" Crow racing belt will hold everyone in place once we hit the gas.
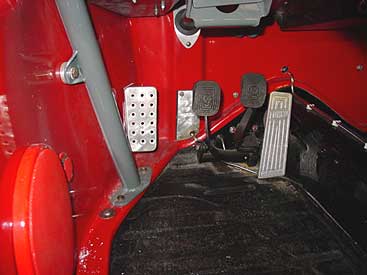
The controls of the buggy are pretty standard with the addition of the changes needed for the CNC hydraulic clutch and a roller gas pedal. We also fabricated a foot rest for your left foot. On long rides in these buggies your left foot tends to get a cramp from being angled, so the foot brace gives you something to rest your left foot on that is on the same plane as the throttle.
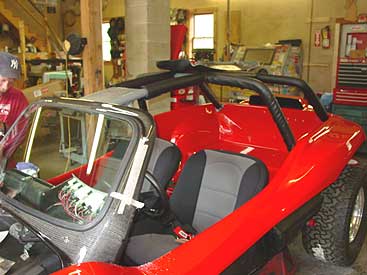
Here you can see more of the small details are going together. The windshield in mounted and the new (all glass) rear view mirrors are being installed and the wipers are being installed.
This image shows the rear seat installed. The foam backing and the seat cover from Beard have been installed and another set of Crow 3" lap belts have been installed to keep the kids strapped in.
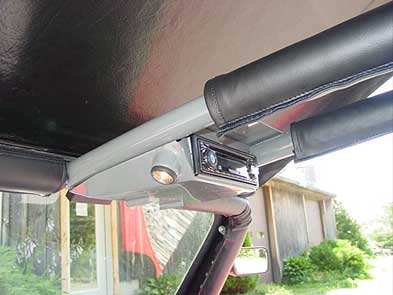
Inside you can see the radio mount and interior/map light set up has been painted and installed. At night these little map lights light up the interior well and it is easy to read a map or find the next CD.
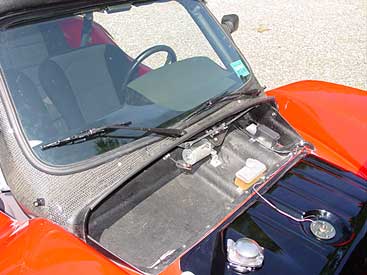
Under the hood is now complete as well. The fuel system has been finished up and the wipers and arms are now in place.
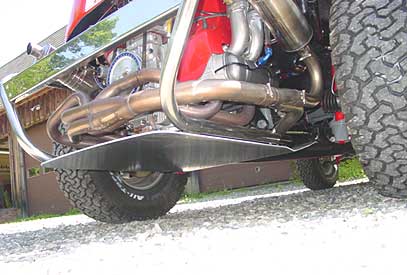
Underneath the running gear we added a think aluminum skid plate to protect everything from on and off road hazards, just in case we do hit a rock, it won't take out the bottom of the engine or the stainless steel exhaust system, and it is easy to remove for service as well.
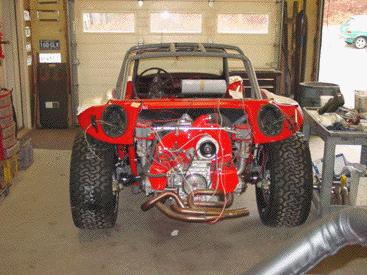
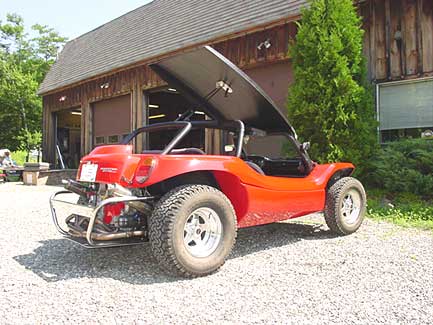
Here you can see the rear end of the buggy with everything in place. The type 4 engine looks at home behind the new bumpers and the custom air box.
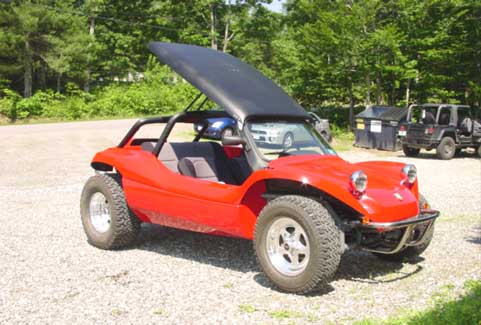
This is the completed buggy. Manxter 2 plus 2 #9 ready for the road and summer fun.
Rear view of the completed Manxter #9.
If you have dune buggy dreams that you need turned into reality, contact ECR. We can make all your buggy dreams come true and get you into one of the coolest cars on the planet.
BACK TO THE BUILD UPS SECTION
ECR
21 Tolman Road
Warren, ME 04864
ph: 207-594-8086
fax 207-594-8120
email: ecrover@midcoast.com